A Look Behind the Scenes
Between the concept and a finished 3D sculpture, the path between has many different steps that can take time, precision, and attention to detail. Here at Dream Buildz Studio it’s my job to make sure many of these different steps are taken care of, in order to make sure we have a clean, finished product to bring to our customer.
But what sort of steps need to be taken? Why is someone like me needed to help make sure things run smoothly? I hope to bring you through one of my weeks here at Dream Buildz, in the hopes I might be able to answer some of those questions, and give you a better idea of what our work looks like.
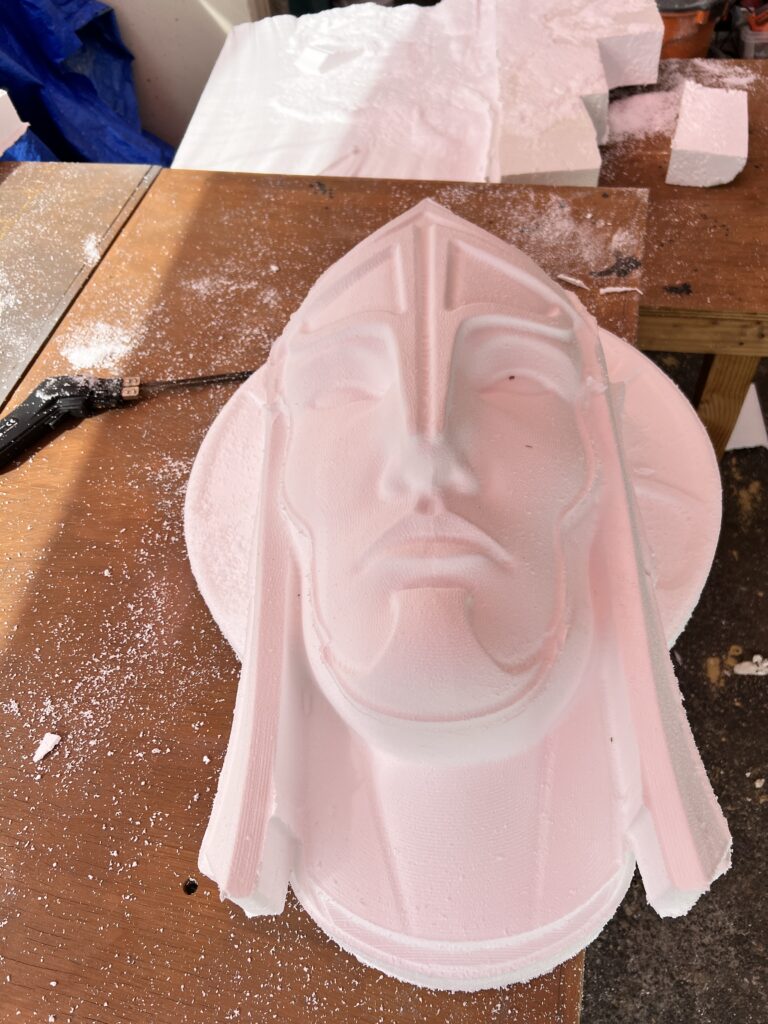
To start with, most of our projects need to be cut out of large rectangular EPS foam boards on our CNC machine. In order to cut them out, the pathing needs to be created from the 3D Models, which is a process handled by Brad here at Dream Buildz. This is a very time intensive process, involving splitting up the model into small segments and laying them out on the dimensions for the machine. Given that we’re working on multiple concurrent projects at the same time, this takes a lot of his time, which is where I come in. After I’m given this pathing by Brad, I load it onto the machine, along with the foam boards, and start the machine. Once that’s done, I can remove it, and load the next board for the next file.
Furthermore, the pieces need to be extracted from the board after they’ve been cut. So while the machines are running, I carve out the pieces with a knife, setting them aside. Truthfully, it’s a fun sort of process! When they’re extracted, all the pieces look very disjointed, and putting them together with our foam glue is like working on a large, permanent jigsaw puzzle. (Usually with far fewer pieces.)
But once they’re put together like this, there are usually bits of foam and glue that hang off the sides, like a too big piece of lettuce on a too small burger. All of it needs to be precisely trimmed off in order to create a smooth transition between the pieces. You need to be careful on this step too- cut it too close and you might end up damaging the pieces, or creating a wonky transition.
Then, I work on seaming the sculpture. The glue isn’t too good at closing the gaps between the pieces, and once its expanded and hardened, there’s usually many bubbles and gaps between the glue. What it needs is a solid, smooth seal between the pieces, to make sure the gap is invisible on the final product. For that, we actually use drywall putty- a moldable paste that hardens into a solid grey substance that’s easily sanded down. With it, we can create a perfect transition between the pieces. After the final sanding, it’s ready for the hard coat across the entire sculpture!
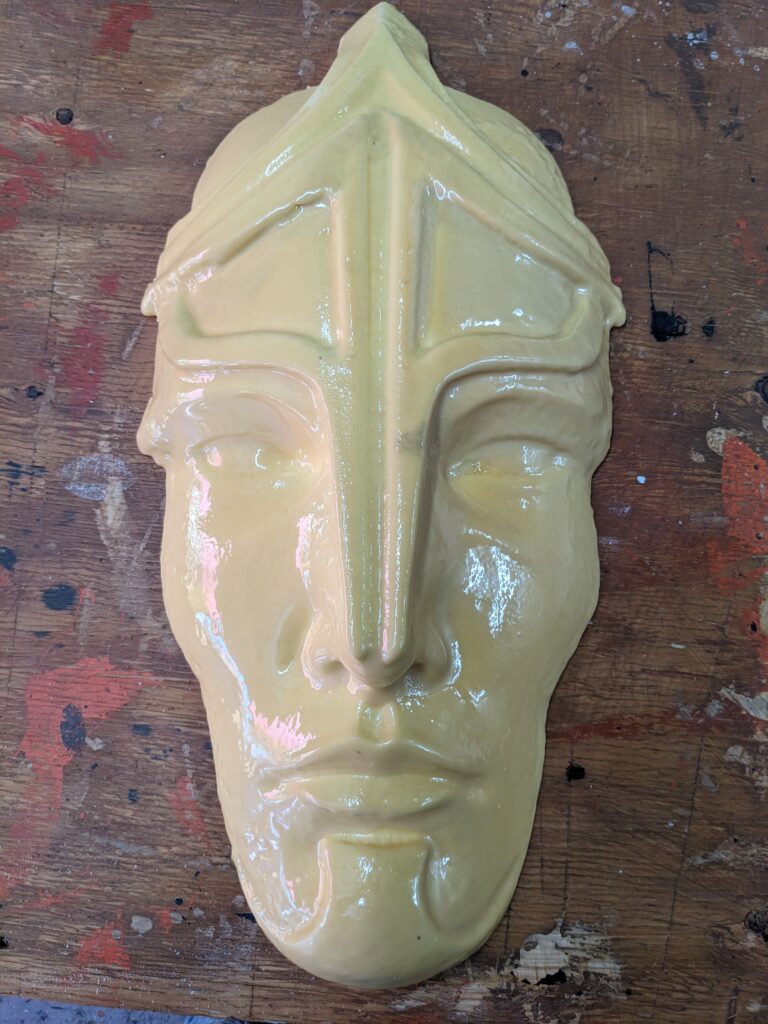
While this is one of the shorter steps of the whole process, it’s one of the more demanding tasks. In order to get the hard coat on, we need to use compressed air to spray the urethane coat over the piece. But in order to make sure there’s no overspray into the businesses beside us, we have to do this step within a large, inflatable spray tent. After bringing the pieces into the tent, and getting into our protective gear, we begin spraying.
We have to split this step up because once we start spraying, and the cloud of urethane lingers in the air, the whole tent turns into one big oven in the Arizona heat. It’d be really unsafe if either of us tried to do the multiple coats alone, because at those temperatures it’s very easy to get heat stroke. Together, we can take shifts, doing one coat and swapping off to take a breather and drink water in between.
In the end, we usually do 2-5 coats, depending on the complexity of the piece. But even then, we can sometimes miss small spots where the spray couldn’t reach, like holes and sharp angles. For this, we use a small, hand mixed coat of the very same urethane, which we can brush on with precision, to make sure the whole piece is thoroughly sealed within the urethane coat.
After all that, we’re still not quite done. After the coat is added, the whole piece is the color of the urethane- which is also partially see through. Any marks made beneath the coat, like sharpie marks on the foam to help guide past steps, is still visible through it. So now, we need to paint the piece.
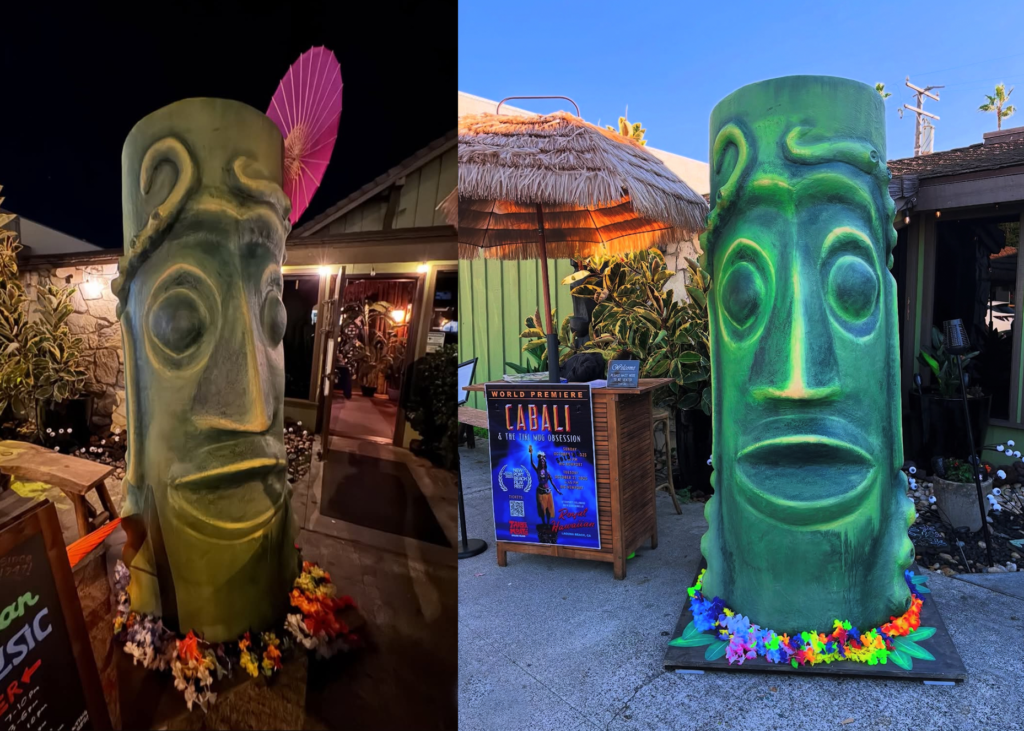
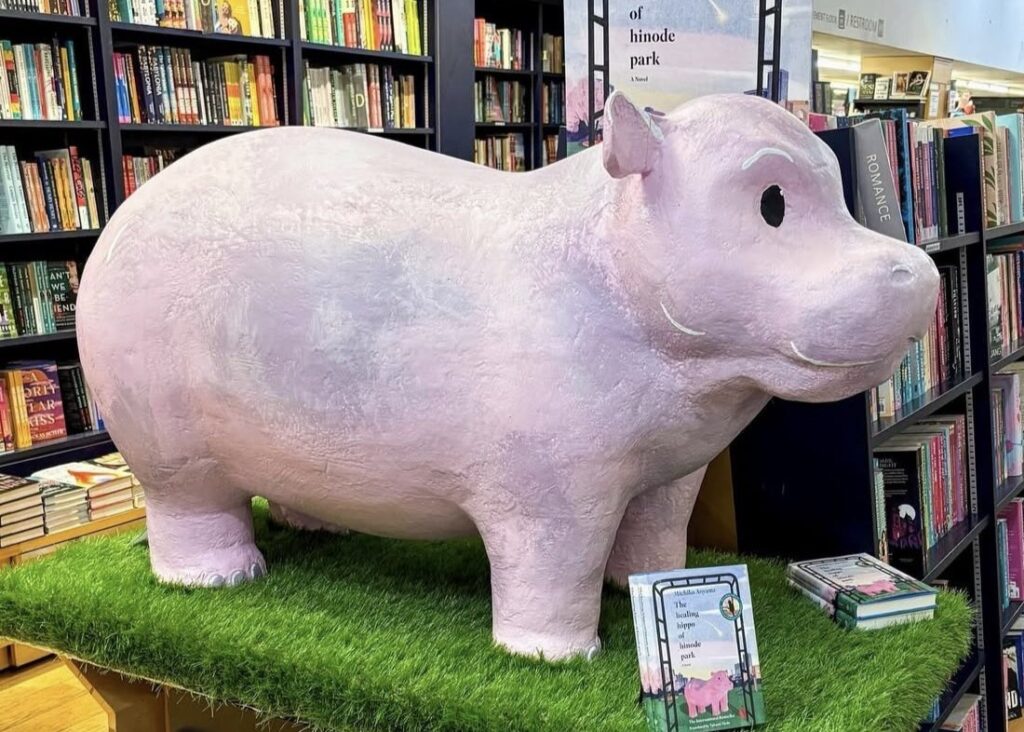
We start with a coat of primer in order to cover up the surface beneath, and create a nice surface to add the paint to. After that, we add base coats, of whatever the project might require. Sometimes this is sprayed on, and sometimes it’s hand brushed on the piece. After the base coats are applied, we focus on details- highlights and shadows, and other small features that would sit atop the base coat. After all this is added, the piece is ready to go! All that’s left to do for me is to help load the sculpture up, and deliver it to the client.
All in all, these steps can take days and days of work. Doing the urethane hard coat alone takes a day itself to do! While all this happens for a single project, and sometimes multiple times for the same project, we at Dream Buildz have many different projects we’re working on concurrently. Having someone like me dedicated to focusing on these steps is important, and helpful to the studio, and leaves others to focus on other creative avenues and skills, such as graphic design, illustration, animation, and 3D Modeling.
